Are you adding a post to your WordPress site and looking for the option to add the featured image in WordPress Gutenberg editor?
The featured image is the main image that will help to make your post attractive. Thus, we recommend you use the featured image on every post you create.
It is very simple to add featured images in WordPress posts. In this blog, we are going to share the basic steps to do that.
Steps to Add Featured Image in WordPress
- At first, login to your WordPress website
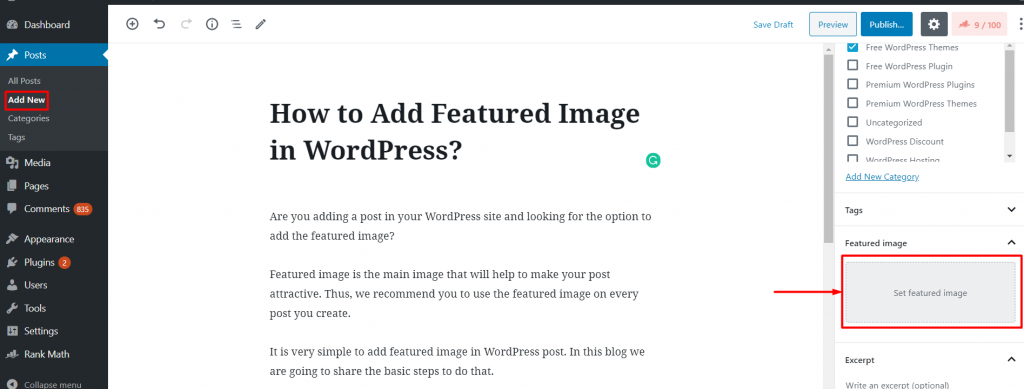
- From the admin panel, go to the post and click on Add New
- Give the title of the post
- Enter the content on the post
- On the right-hand side, you will see the option for the featured image
- Click on it and upload the featured image either from your computer or from the media library
- Click on the Publish button to publish the post.

If you want to add or change the featured image for the previously live posts, do the following things,
- From Admin dashboard go to Posts > All Post
- You will see the list of posts.
- Hover over the post, which you want to edit.
- Click on the Edit button and see the right-hand side corner.
- Now, click on the featured image and you can upload or replace the featured image.
- Finally, click on the Update button at the top.

We believe that you are now able to add the featured image to your post or replace it.
Do you need any help regarding this? Please drop your comment below.


